Showing posts with label Taste. Show all posts

Thursday, February 12, 2015

Dipped in Love


I have been seeing chocolate covered strawberries all over the place this week at different grocery stores in preparation for the big day Saturday.  And I always stop to look at them, drool over them and then I see the price tag.  I know it's a treat, and I am all for justifying an expensive chocolate indulgence, but the prices are so marked up for what they are, it made me think twice about buying them-(well, really more like five times because they just looked so good!)

But then I remembered I just bought strawberries at the store the night before, had melting chocolates on hand from a recent fondue night (yes, I believe fondue is a meal), and extra Valentine's themed sprinkles from making my something sweet popcorn snack.

So within fifteen minutes of preparation and decoration and only spending six dollars on the strawberries and sprinkles and already having the chocolate on hand (add another five dollars if you need to buy a new bag), you will have yourself close to two dozen, delicious chocolate covered strawberries.  They ended up saving me money without sacrificing the amazing taste.  These are easy to make the day before Valentine's Day so you can have them on hand for enjoying through out the day with the ones you love...or just for yourself-I won't judge ;)  Happy Valentine's Day!


Chocolate Covered Strawberries
  • 1 container of fresh strawberries, washed and dried
  • 1 12oz. package of dark melting chocolates
  • Sprinkles for decoration


~Wash and dry strawberries
~Melt dark chocolate according to the package (usually involves defrosting in the microwave for 30 second intervals and stirring in-between...the stirring is key!)
~Line a baking sheet with parchment or wax paper
~Once chocolate is melted, dip each strawberry in chocolate and place on baking sheet
~Dip about four strawberries and allow to cool for a few seconds before adding the sprinkles (they will melt otherwise)
~Once finished, allow the chocolate to harden by placing them in the refrigerator for 30-45 minutes
~Serve fresh or keep refrigerated for up to 24 hours


Monday, February 9, 2015

Something Sweet


My favorite thing about Valentine's Day is probably all of the sweets available around every corner you turn when out at most stores.  I know it's a day to celebrate love, and I do, my love for chocolates and sweets.  (My husband knows I celebrate my love for him every day, duh).  

But since I can't eat every single heart box of chocolate I buy (I never have a problem buying chocolates for myself, FYI), I decided to get my chocolate fix the semi-healthy way this time.  

Air popped pop corn is a low-calorie, healthy way to munch on something savory without feeling too guilty.  Add a little bit of melted white chocolate and some heart sprinkles and it becomes an extra festive treat.  

So go ahead and make this tonight or really any night this week if your heart desires.  It's the perfect Valentine's snack to enjoy for one, two or four.  Happy Monday!
Xo,
Laura


White Chocolate Heart Popcorn:

  • 1/2 cup popped kernels (I use my Whirley Pop, it makes the best tasting popcorn I've ever had!)
  • 1 12oz. bag of white chocolate melting chips
  • Valentine's themed sprinkles (easy to find at grocery stores-mine are from Walmart)


~Make popcorn and set aside to cool in a large bowl
~Melt white chocolate according to package (usually involves defrosting in the microwave for 30 second intervals and stirring in-between...the stirring is key!)
~Once chocolate is melted, pour over popcorn and mix together-try to do this step quickly so the chocolate doesn't harden
~Mix in sprinkles
~Place on a baking sheet lined with parchment paper in a single layer (I used cut up wax paper bags since I didn't have parchment paper) and allow to cool at room temperature or put out in your freezing cold garage like me for twenty minutes
~Once chocolate has hardened, enjoy! 


Monday, February 2, 2015

Breakfast in Bed


It's officially February and the month of Valentine's Day.  I have always found this holiday to be a good time to spread the love, no matter who you are with at the moment.  

It should be a month to love your family, your girlfriends, your four-legged friends, and anyone else who holds their owns special place in your heart...and that should include you!

Valentine's Day is the perfect day to treat someone you love {Valentine's goodies to come next week} and give them a big card with a bear holding a heart, but the time leading up to the day and even after, should be about loving yourself.  Sometimes it's so easy to get caught up trying to please everyone else and take care of them all before yourself.  And most of the time that is the way it should be.  Giving is better than receiving, definitely.  But we all need to remember to give some love to ourselves every once in a while.  

Even if it's having your breakfast in bed, taking a hot bubble bath with a glass of wine, or making yourself a healthy treat, you deserve it.  Giving yourself love will only fill you with happiness and peace.  And with this, you can spread the love to all of the others in your life.  


"I have decided to stick with love.  Hate is too great a burden to bear."  MLK Jr. 

So this week I will help you with taking a little time and effort to love yourself.  So when your husband is wondering where his dinner is, you can blame it on me that you are upstairs taking a bath and reading a book and forgot to cook-I swear that doesn't happen that often. ;)

Xo,
Laura


Breakfast in Bed Essentials:

Tray:  In hopes someone else will serve your food to you 

Plates: I believe in using our china for every day occasions, why not? 

Cup: A perfect Tjmaxx find 

French Press: Nothing like a hot cup of coffee

Vase: A beautiful present from my mom

Silverware: Because it's French (and the knives are the sharpest I've ever used!)

Juice Glass: Old purchase, but similar style here


Friday, January 30, 2015

Super Bowl Sunday


This Sunday is the perfect excuse to get together with your friends and family and over indulge in plenty of snacks, drinks and too much television. 

I am not always the biggest sports fan, but I love any excuse to embrace a theme and make an evening out of it.  (Football is always more fun to watch when you have popcorn and cupcakes near by in football themed bowls, right?) 

All you need is a quick trip to Walmart for a few festive cups and bowls, your favorite candies and snacks, and to add a little variety to the snack selection, I embellished the pretzels with some different flavors: honey mustard, ranch, and buffalo wing sauce.  

Make these pretzels earlier in the day so when game time comes, all you have to do is grab a bowl and focus, on the food and the game.  

Xo,
Laura


Fruit Skewers: For the Patriots fans, alternate strawberries, bananas, and blueberries and for Seahawks fans alternate between green grapes (or kiwi slices) and blueberries

Dessert:  Most grocery stores have already baked treats to support your team.  Add some football toothpicks or football sugar toppings to make them a little more festive (Check out Party City)

Pretzels

Honey Mustard Bites:

  • 12 oz. sourdough pretzel bites
  • 2/3 cup canola or vegetable oil
  • 3 tbsp. honey
  • 2 tbsp. honey mustard
  • 1 tsp. onion powder
~Preheat the oven to 275 degrees Fahrenheit and coat a baking sheet with non-stick cooking spray
~Mix all ingredients together (except the pretzels) in a bowl 
~Add the pretzels to the bowl and mix until well coated with mixture
~Pour the pretzels onto the baking sheet and spread out in a single layer
~Bake for 30 minutes, mixing half way through
~Allow to cool on the baking sheet for 10 minutes before serving or storing until ready to serve

Ranch Dips:
  • 12 oz. mini pretzels
  • 6 oz. canola or vegetable oil
  • 1 tbsp dill weed
  • 1 tbsp garlic salt or powder
  • 1 packet ranch salad dressing mix
~Preheat the oven to 275 degrees Fahrenheit and coat a baking sheet with non-stick cooking spray
~Mix all ingredients together (except the pretzels) in a bowl
~Add the pretzels to the bowl and mix until well coated with mixture
~Pour the pretzels onto the baking sheet and spread out in a single layer
~Bake for 30 minutes, mixing every 10 minutes
~Allow to cool on the baking sheet for 10 minutes before serving or storing until ready to serve

Buffalo Wing Pretzel Bites:
  • 12 oz. thin pretzel sticks
  • 1/2 cup melted butter
  • 1/2 cup buffalo wing sauce of your choice 
  • 2 tsp garlic powder
  • salt and pepper to taste
~Preheat the oven to 300 degrees Fahrenheit and coat a baking sheet with non-stick cooking spray
~Mix all ingredients together (except the pretzels) in a bowl
~Add the pretzels to the bowl and mix until well coated with mixture
~Pour the pretzels onto the baking sheet and spread out in a single layer
~Bake for 30 minutes, mixing every 10 minutes (pretzels do become soggy-ish, but they will harden back up when the cool down after baking)
~Allow to cool on the baking sheet for at least 10 minutes before serving or storing until ready to serve


Wednesday, January 28, 2015

More Spaghetti (squash) Please!


Spaghetti squash has become one of my favorite substitutions for a comfort food meal.  I love pasta and spaghetti (who doesn't?), but I usually feel overstuffed and guilty after eating it.  

So, in order to still satisfy my cravings for something hardy and Italian (meaning a meal with a lot of cheese), I turn to spaghetti squash.  

This meal is easy to make, it just takes a little extra time in order to cook the squash and then allow the bake to cook all the way through.  It's a perfect meal to start making on a snowy afternoon, so by the time the sun sets, the fire is going and it's appropriate to be drinking your second glass of red wine, your dinner will be ready.  

Xo,
Laura

Ingredients:
serves 4
  • 2 whole spaghetti squashes 
  • 1 jar of pasta sauce
  • 2 cups (or 3 if your me) of shredded cheese of your choice-parmesan or mozzarella is the best
  • 2 cups of broccoli or other veggies


~Cut each spaghetti squash in half, vertically
~Scoop out the seeds and discard
~Drizzle squash with some olive oil and salt and pepper
~Place down on baking sheet with skin facing out
~Bake at 400 degrees Fahrenheit for 45-55 minutes or until squash is soft
~Using a fork, scrape inside of squash into a baking dish (it really does come out like cooked spaghetti)
~Add pasta sauce, cheese, and any other desired veggies to the dish and mix together
~Cook this in the oven at 400 degrees Fahrenheit for 25-35 minutes
~Enjoy, with a glass of red wine, of course :)

Friday, December 5, 2014

Quinoa Stuffed Acorn Squash


With the weather getting colder and more snowy evenings coming this way, I tend to want to stay at home for dinner and a enjoy a comfort food meal with a good glass of red wine.  But if I ate mac n' cheese, vegetable lasagna and pizza every night, I probably wouldn't be able to fit out of my house when it was time for me to leave.  Thus, incorporating a savory, filling meal into the dinner line-up that doesn't make me change too many pant sizes.

I've tried a few different versions of what to mix into quinoa to make it just right, and I (obviously) really enjoy it with the pumpkin seeds, almonds, and pomegranate seeds for the taste and the crunch.  The acorn squash is the treat to this meal and all you need to season it is a little olive oil, salt and pepper. Enjoy!

Xo,
Laura


Ingredients:
Serves 4 (make with just one acorn squash and you will have some quinoa left over for lunch!)
  • 2  acorn squash
  • 1 pomegranate (1/2 cup pomegranate seeds)
  • 1 cup quinoa
  • 1/4 cup pumpkin seeds
  • 1/4 cup slivered almonds
  • 1 tbsp olive oil
  • salt and pepper to taste

~Preheat oven to 400 degrees fahrenheit 
~Cut acorn squash in half vertically
~Scoop out seeds in the middle to make a space for the quinoa 
~Drizzle squash with olive oil and sprinkle with salt and pepper
~Line a baking sheet with tin foil and lay squash on baking sheet, squash side down, skin facing out
~Bake squash for 35-45 minutes until soft
~While squash is baking, cook quinoa according to package directions (usually 1 cup quinoa to 2 cups water and takes approximately 15 to 20 minutes to cook)
~Once quinoa is cooked, mix in pumpkin seeds, almonds, and pomegranate seeds into the quinoa
~Remove squash from oven, allow to cool for five minutes before removing from baking sheet
~Scoop quinoa mixture into acorn squash and serve warm


Tuesday, December 2, 2014

Gingerbread Cookie Smoothie


I have officially made the switch from my fall obsession and pumpkin everything craze to more peppermint infused cocktails and ginger spiced everything.  However, I am still trying to stay healthy through out the holiday without over indulging every day.  

I love the holiday themed desserts and drinks.  It is very hard for me to say no all the time to freshly baked cookies or hot chocolate as my after dinner treat, again every night.  For me, the holiday is a time to treat yourself a few times to enjoy the deliciousness of all things homemade, but I also like to keep active and healthy all through out the Christmas season.

I decided to try a few extra spices in my smoothie the other morning to try and create the feeling of drinking a liquid gingerbread cookie.  It is still low in calories, keeps you full for a few hours, and really does taste like a healthy, holiday treat.  I added a scoop of protein to make it a full breakfast, but without the protein it tastes just as good.  Pour yourself a glass or two and enjoy feeling full and satisfied with this healthy, holiday smoothie.  Happy December!

Xo,
Laura


Ingredients:

  • 1 and 1/2 cups of vanilla almond milk (coconut milk or regular milk works too)
  • 1 frozen banana
  • 1 cup of ice cubes (add extra if the banana is not frozen)
  • 1/2 tsp cinnamon
  • 1/2 tsp nutmeg
  • 1/2 tsp ground ginger
  • 1/8 tsp ground cloves
  • 1 tsp vanilla extract
  • Extra: 1 scoop Perfect Fit Protein (my favorite!)
Add all ingredients to blender and mix until smooth.  Add an extra shake or two of cinnamon to the top of the smoothie and enjoy!

Wednesday, November 19, 2014

Soup for You


It's officially too chilly out for cold salads and sandwiches at lunch every day, so I am now on a soup kick. For me soups are a great way to get a few servings of vegetables in one meal, feel satisfied and warm my chilled bones.  This vegetable orzo soup is really easy to make and most of the ingredients are probably already in your kitchen.  It takes about five minutes to prep the vegetables and 20 minutes to cook.  Add some freshly baked rolls with butter on the side (and when I say freshly baked, I mean Pillsbury rolls) and enjoy! 

Xo,
Laura


Ingredients:

2 tablespoons of olive oil
1 cup chopped carrots
1 cup chopped celery
1 to 2 cloves garlic, finely chopped
1 can stewed tomatoes
6 cups vegetable broth
8 oz. orzo 
4 cups spinach
1/4 teaspoon dried oregano
1/4 teaspoon dried rosemary
1/4 teaspoon dried thyme
salt and pepper to taste


  • Heat olive oil in a stock pot at medium heat (I had frozen some fresh herbs from my garden this summer in ice cube trays with olive oil so I used those for my soup).
  • Add celery, carrots, and garlic to the pot and sauté for 3 minutes
  • Add tomatoes, vegetable broth, orzo, and spices to the pot and stir together
  • Cover pot and allow to cook over medium-low heat for fifteen minutes, stirring occasionally 
  • Add the spinach to the pot and stir. The spinach only needs 2 minutes to cook and will turn a bright green color
  • Remove pot from the heat and spoon into soup bowls
  • Add salt and pepper to taste and eat while nice and warm


Wednesday, September 24, 2014

Gluten Free Pumpkin Muffins


A fall baking special (surprise, surprise-I can't stop myself).  Gluten free. Pumpkin. Delicious muffins. Enough said. Happy Wednesday!


Pumpkin Muffins:
~Makes 12 muffins
  • 3 eggs
  • 1/3 cup organic pumpkin pie mix
  • 1/2 tsp vanilla extract
  • 1/4 cup honey
  • 1 cup almond flour
  • 1 tbsp pumpkin pie spice
  • 1/4 tsp baking powder
  • pinch of sea salt
  • 2 tbsp of coconut oil
~Preheat oven to 350 degrees Fahrenheit 
~Beat three eggs in a medium sized bowl (I use a whisk and mix everything by hand-mixer can be used too)
~Mix in pumpkin puree, honey, and vanilla extract
~Add almond flour, pumpkin pie spice, baking powder, and sea salt to wet ingredients and mix well
~Add the coconut oil and mix until ingredients are blended together
~Spray a muffin baking sheet with non-stick baking spray or coconut oil spray
~Add muffin mixture to pan and fill half way or slightly less
~Bake for 15-18 minutes, until the edges start to brown
~Remove from oven and let cool for 1 minute and then remove from pan and enjoy


Pumpkin candles: Pottery barn | Muffin stand: Macy's 

Wednesday, September 17, 2014

Game Day Meal


Who doesn't love cozying up in front of the fire and television, in comfy clothes watching your favorite football team while having deliciously smelling foods cooking in the kitchen? If anyone is ever doing this in their home I would love to be invited. It sounds like the perfect fall Sunday or Monday evening to me. 

I want to share three of my favorite go to football watching foods and drink today with everyone.  They are as usual, easy to make, taste great (obviously to me they do), and of course a fall-inspiried drink is included.  The chili and the mulled wine are both dishes you can start earlier in the day so when it's time to park your behind on the sofa your meal is ready come game time.  So put your team jersey on and get your Tervis team cup (c/0) filled up with some mulled wine, light the fire, enjoy a home cooked meal, and smile. It's good to be alive on a fall football Sunday night.

Xo,
Laura


Vegetarian Chili 
~serves 8
  • 1 can (15oz.) of each black beans, kidney beans, and pinto beans
  • 2 cans (15 oz. each) of stewed tomatoes
  • 1 large can (28oz.) of tomato puree
  • 1 small bag of frozen corn 
  • 1 bag of Morning Star meatless crumbles 
  • Salt and pepper to taste
  • Shredded cheese for topping
-Add all ingredients to the crock pot (I like to discard some of the liquid from the beans)
-Mix all ingredients together in the crock pot and cook on high for 4 hours or cook on low for 8 hours
-Turn temperature down to the keep warm setting until ready to serve
Enjoy-yes, it's really that easy :)


Mini Mac n' Cheese
~Serves 6 
  • 1/2 pound of elbow macaroni (I used gluten free)
  • 2 cups of sharp cheddar cheese 
  • 1/2 cup parmesan cheese
  • 1 egg yolk
  • 2 tbsp of butter
  • 1 tbsp of paprika
  • pinch of salt
-Preheat the oven to 425 degrees Fahrenheit
-Boil water for macaroni and allow to cook for 5 minutes, drain and rinse
-Using a muffin pan or mini cocottes, brush the sides with butter and sprinkle the bottom of each dish with half of the parmesan cheese
-In a saucepan over medium-high heat, melt the rest of the butter and the sharp cheddar cheese
-Add the salt, egg yolk, and paprika to the melted cheese
-Place the macaroni back in the pot and add cheese mixture to the noodles and stir together
-Add mixture to dishes/muffin pan and bake in oven for 10 minutes
-Allow to cool for 5-10 minutes before serving

These Le Creuset mini cocottes are available at Williams-Sonoma and are great for entertaining


Mulled Wine
~Serves 6-8
  • 1 bottle (750ml) of red wine (I used a local wineries Merlot from Nimble Hill, Tunkhannock, PA)
  • 4 cups of apple cider (Brace's, of course)
  • 1/2 orange juiced and two slices to season the mixture while warming (buy one orange)
  • 8 whole cloves
  • 2 cinnamon sticks or 1 tsp of powdered cinnamon
-Add wine, apple cider, orange juice, orange slices, cloves, and cinnamon to a crock pot or to a sauce pan
-If cooking in a sauce pan bring to a boil and then allow to simmer on low heat for 10 minutes and then serve
-If cooking in a crock pot set temperature at low and allow to mull over 3-4 hours or until ready to serve; you can keep this on low all day
-Pour into mugs that can withstand hot temperatures (I used my Tervis mug c/0, which is great for hot beverages), add an orange for garnish, and cheers!


Monday, September 8, 2014

Apple Season


I am so excited to announce this week is Apple Week! (yes this is my own made up celebratory week, put it on your calendar!)  I usually visit the farmer's market or my local apple orchard at least twice a week in the fall to savor as many delicious apples as I possibly can in a day.  I love getting outdoors, smelling the crisp scent from the apples, and creating new dishes I can enjoy all fall season.

This apple galette is from one of my favorite cooking inspirations, Erin Gleeson from the Forest Feast. I've made this recipe before and every time I ask myself why I don't make it more often.  It's so easy to make, let's you be a little creative with your apple placement, and it tastes like it took all day to make-my kind of dish. 

So have fun with choosing your favorite apples; I used this new flavor Brace's Orchard introduced me to, Zestar, which for me was the perfect combination of my two favorite apples, honey crisp and macintosh.  Pick a good creamy, buttery cheese to create that savory side of the dish and don't feel badly you bought pre-made pie crust (unless you want to get fancy and make you're own crust, you'll have to find your own recipe for that :D ).  And don't worry, even though this week is apple week, I have a feeling I will be continuing the celebration for many more weeks to come. 

Xo,
Laura 


Apple and Honey Galette
~serves 4
~prep time: 10 minutes; cook time: 20-25 minutes


  • 1 14 oz. store-bought pie dough 
  • 1/2 cup of Brie cheese-I used the whole container, probably more like a cup for me :)
  • 1 Tbsp brown sugar
  • 1 tsp of cinnamon-1/2 for the cheese, 1/2 to top the apples
  • 1 Tbsp of honey
  • 2 thinly sliced apples
~Lay out the pie crust on a baking sheet or a shallow pie dish
~Top crust with brie, brown sugar, and cinnamon
~Cover the cheese layer with 2 thinly sliced apples
~Drizzle the apples with honey and cinnamon
~Pinch the edges to form a crust
~Bake at 350 degrees Fahrenheit for 20-25 minutes, until golden
Enjoy!

Friday, August 29, 2014

Red, White, and Blue Cool Down


This week has been filled with sunshine, cloudless skies, and promises of summer still lingering for days to come.  It also means I am really hot and need something to keep me cool.

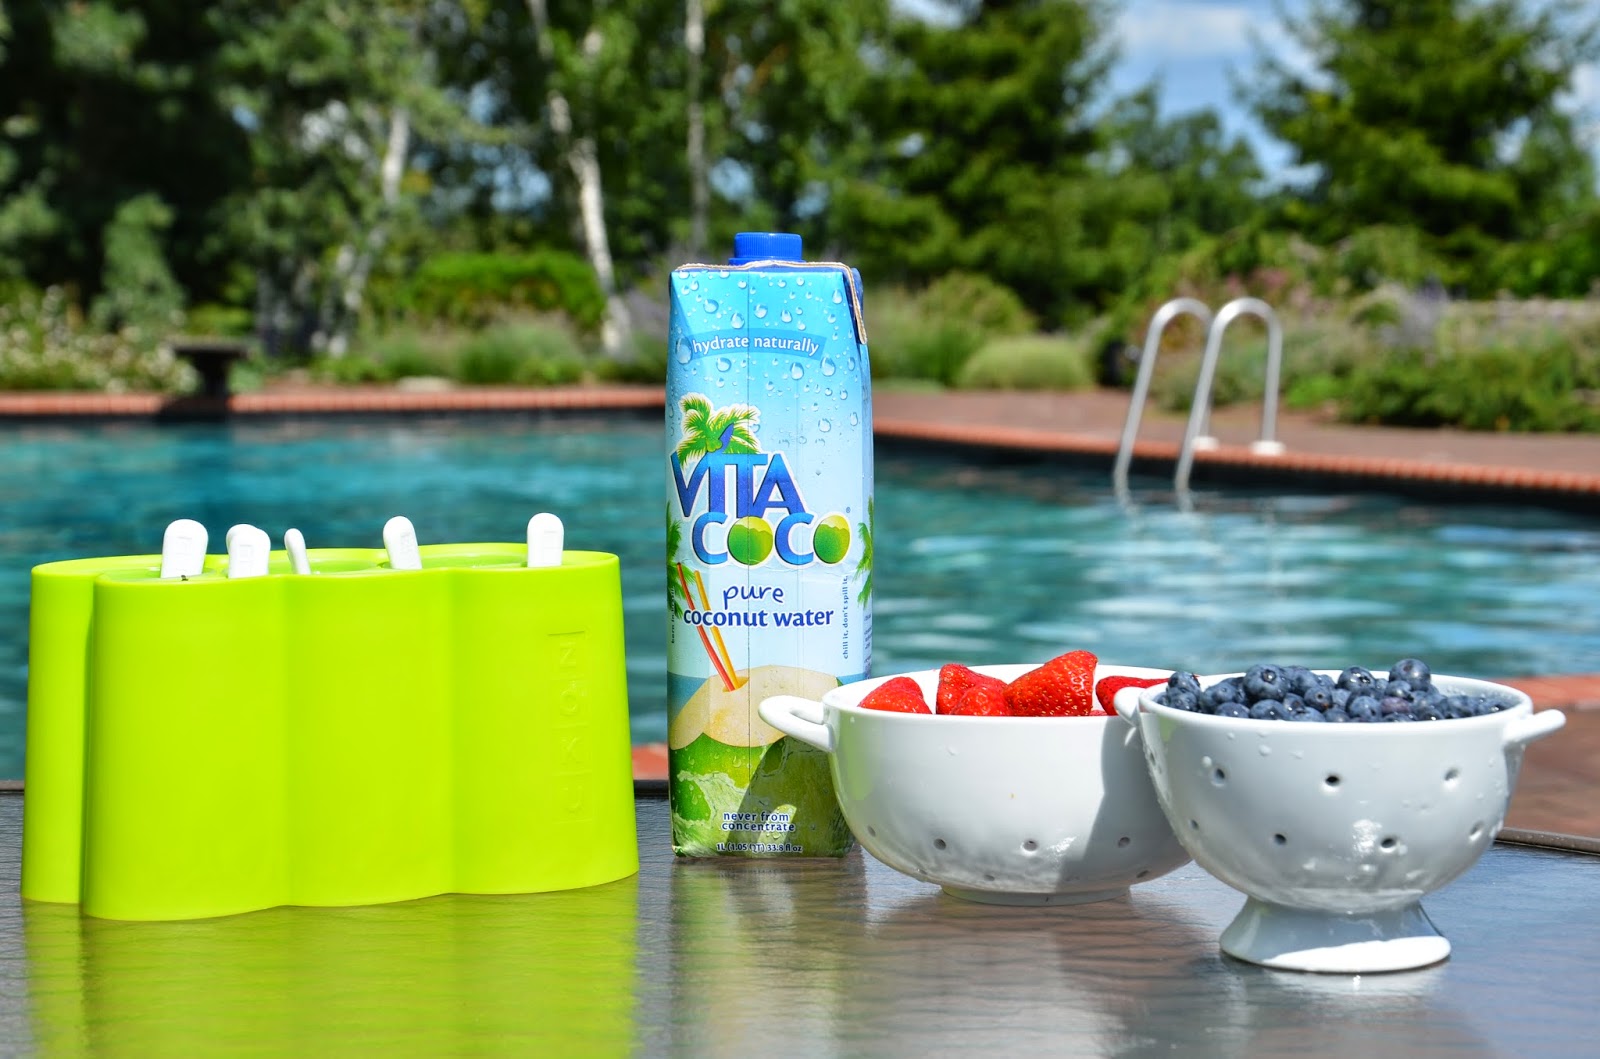
All you need is some strawberries and blueberries, Vita Coco coconut water, and the Zoku popsicle mold.  With these few ingredients and time to freeze overnight, you will have a delicious and refreshing, low-calorie summer treat.  


I have been wanting to make popsicles all summer, and I finally purchased the Zoku popsicle mold a few weeks ago.  It's inexpensive and can be purchased here, and I will be continuing to experiment with popsicle treats for the rest of the summer into fall (carmel apple popsicles sound great to me!)  


So enjoy this weekend holiday coming up with something festive, tasty, and fun!


Red, White, and Blue Popsicles
~Serves 6

  • 1 cup of chopped strawberries
  • 1 cup of fresh blueberries
  • 1 large bottle of Vita Coco coconut water
  • Zoku popsicle mold
~Add strawberries to the base of the mold-I used about 4 to 5 strawberry pieces
~Fill the mold half way with coconut water
~Add blueberries-I used about 10 blueberries per popsicle
~Fill the rest of the mold with coconut water
~Allow to freeze overnight 


Enjoy!

Xo,
Laura